If you have added one of our custom txsoundpacks.com installer packages to your Free Pack or Pro Pack folder, follow these quick steps to automatically update your radio’s SD card. We also provide a manual installation method for custom setups and third-party files.
Method 1: The Quick Way (Using the EdgeTX Installer)
The easiest way to install your sound pack is by using our built-in EdgeTX Installer tool right here on the website. You won’t have to worry about managing SD cards, finding the correct folders, or accidentally overwriting system files. Best of all, it includes a built-in backup tool!
- Connect Your Radio: Plug your radio into your computer via USB.
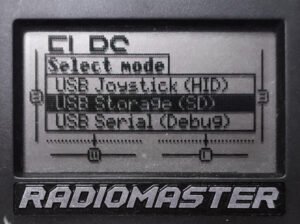
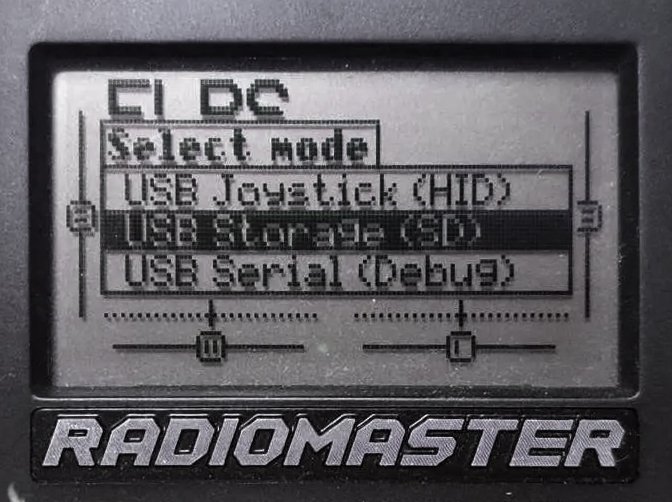
- Select USB Storage: Select “USB Storage (SD)” on your radio’s screen.
- Navigate to Downloads: Navigate to your Free Pack or Pro Pack folder in your account on our website and click the blue “Install” button next to your sound pack.

- Select Drive: In the popup, click “Select EdgeTX Drive” to let your browser connect to the radio.

- Confirm Drive: Select your radio’s SD card drive from the browser prompt.

- Validate SD Card: If you select a install location that doesn’t contain a folder structure consistent with a Edge TX SD card, a pop up will arrive directing you to choose the correct install location.

- Backup: Click “Generate Backup ZIP” to download a safe copy of your current voice pack.

- Confirm: Check the confirmation box to allow overwriting existing sound files.

- Install: Click “Install Files” and wait for the process to complete!



Method 2: The Manual Way (Advanced Users)
If you prefer to manually manage your file system, you can install the sound packs by carefully placing the files into the correct directories on your radio’s SD card partition. Warning: Be very careful not to accidentally delete or overwrite critical EdgeTX system files, as this can corrupt your radio’s firmware.
- Download: Download the sound pack
.ziparchive from your account’s Downloads area. - Extract: Extract the archive using a file extraction utility (e.g., 7-Zip, WinRAR, or your OS native extractor) to reveal the
SOUNDSfolder. - Connect Your Radio: Power on your radio and connect it to your computer using a data-capable USB-C cable.
- Select USB Storage: Use the scroll wheel to select “USB Storage (SD)” on your radio’s display and click to confirm.
- Open SD Card: Wait for your computer’s operating system to mount the FAT32 partition of the radio’s SD card and open the drive in your file explorer.
- Copy Files: Drag the extracted
SOUNDSfolder from your computer and drop it directly into the root directory of the SD card. Do not click into any other system folders (such asSCRIPTS,MODELS, orRADIO). - Merge and Replace: If your operating system prompts you, select “Yes” or “Merge” to combine directories, and “Replace files in the destination” to overwrite any older default system sounds.
- Safely Eject: Before unplugging the cable, right-click the drive in your OS and select “Eject” to safely unmount the drive and prevent corruption.
Final Step: Activate & Assign Sounds on Your Radio
Once your files are installed (via Method 1 or Method 2), configure your radio settings:
Set Your Voice Pack Language
- Press and hold the SYS button on your radio to open the System Menu.
- Go to RADIO SETUP and scroll down to Voice Language.
- Select the folder name matching your new sound pack.
Assign Sounds to Switches (Special Functions)
- Press the MDL button to open the Model Setup menu for your active aircraft.
- Navigate to the SPECIAL FUNCTIONS (or
GLOBAL FUNCTIONS) tab. - Select an open slot (e.g.,
SF1) and set the trigger switch position (e.g.,SA↓). - Set the action to Play Track and choose your desired voice callout file.
- Toggle your switch to test the audio!
Need further help? Check out our Radio Compatibility List, view our FAQ, or Contact Support if you run into any issues!
RadioMaster EdgeTX Radios
- Boxer / MAX / Crush
- GX12 / Crush
- MT12
- Pocket / Crush
- T8 / T8 Pro
- TX12 / Mark II
- TX15 / MAX
- TX16S / MAX / Mark II / Mark II MAX / MK3 / MK3 MAX
- Zorro

Jumper EdgeTX Radios
- Bumblebee
- T-Lite / V2
- T-Pro / V2 / S
- T12 / Plus / Pro Hall / Max
- T14
- T15 / Pro
- T16 / Plus / Pro Hall
- T18 / Lite / Pro
- T20 / V2
- T22

FrSky EdgeTX Radios
- Q X7 / Q X7S / ACCESS variants
- X9 Lite / X9 Lite S
- X9D / X9D+ / SE / 2019 variants
- X9E / X9E Hall
- Horus X10 / X10S / Express variants
- Horus X12S / X12S-IRSM
- X-Lite / S / Pro